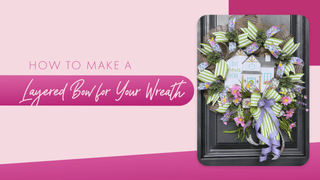
Layered bows are the perfect finishing touch for wreaths, adding depth, charm, and a polished look to your creations. Whether you’re a beginner or a seasoned crafter, learning how to make a layered bow with ribbon is a fun and rewarding skill.
This guide will walk you through the process step-by-step, sharing tips to help you craft stunning bows every time.
Let’s get started!
Introduction to Making Layered Bows for Wreaths
A well-made layered bow can transform your wreath into a show-stopping piece of decor.
With the right combination of ribbons, colours, and techniques, layered bows create a sense of fullness and elegance that elevates any design.
Not sure how to make a layered bow for a wreath?
Don’t worry—this guide has everything you need to get started, whether you’re decorating for a holiday, a special event, or everyday charm.
Supplies Needed for Crafting a Layered Bow
Before diving in, gather these essential materials to make your bow:
-
Ribbon: Use ribbons of varying widths, textures, and patterns to achieve a dynamic layered look.
-
Scissors: Sharp scissors for clean cuts.
-
Wire or Pipe Cleaners: Attach your bow to your wreath.
-
Measuring Tape: Ensures consistent ribbon lengths for a balanced design.
-
Bow Maker Tool (Optional): Helpful for beginners to create even loops.
Step-by-Step Guide: How to Make a Layered Bow for Wreaths
Step 1: Select Your Ribbons
Choose three to four ribbons in complementary colours and patterns. Pair a bold pattern with solid colours and metallic accents for a festive touch.
Step 2: Measure and Cut the Ribbons
Cut each ribbon to your desired length. A good starting point is 12–24 inches for each strip, depending on the size of your wreath. Ensure each ribbon layer is slightly shorter than the one below it for a tiered effect.
Step 3: Create Ribbon Loops
Take the first ribbon and form a loop by bringing both ends toward the center. Pinch the middle of the loop and secure it with a twist of wire or a pipe cleaner. Repeat this process with each ribbon, layering them as you go.
Step 4: Assemble the Layers
Stack the loops on top of each other, starting with the widest ribbon at the bottom and working up to the narrowest ribbon. Adjust the loops to create a balanced and full appearance.
Step 5: Secure the Bow
Wrap a pipe cleaner or floral wire tightly around the center of the bow to hold all layers in place. Leave extra wire to attach the bow to your wreath.
Step 6: Fluff and Finish
Fluff each loop to add volume and adjust the ribbons for symmetry. Trim the ribbon ends into decorative shapes like dovetails or angled cuts for a professional finish.
Pro Tips for Perfecting Your Layered Bow
-
Combining burlap, satin, and wired ribbons adds dimension to your bow.
-
Wired ribbons are easier to shape and maintain their structure.
-
If your first bow isn’t flawless, don’t worry! Experiment with different ribbons and techniques to find what works best for you.
Why Choose Unique in the Creek™ for Your Wreath-Making Needs?
At Unique in the Creek™, we provide everything you need to create stunning wreaths and bows. From high-quality ribbons to innovative wreath-making boards, our supplies make every project a success.
Add the Perfect Touch to Your Wreath
Making a layered bow is a creative way to improve your wreath designs and personalize your decor. Using this guide, you’ll craft beautiful bows that add charm and sophistication to any wreath.
Ready to make your first wreath?
Turn your creative vision into reality with Unique in the Creek™. Shop our collections of ribbons, boards, and accessories today to craft the perfect layered bow for your wreath!
